Click Here!

Detroit’s Big Day For Blooms! – By Vincent J. Zuzow

On Sunday May 16th 2010, Detroit’s Eastern Market once again played host to the annual plant sale event of the year; Flower Day. An excess of 150,000 plant lovers

Eastern Market 'Flower Day' 2010

Eastern Market 'Flower Day' 2010

find their way through the streets of Detroit’s Eastern Market area to seek

out everything from hard-to-find specimens that will add a unique flair to their Earthen Garden to the more common fillers that will bring a tried and true look to the back yard.

Many regular shoppers to the annual event knew to bring their own wagons, baskets and shopping carts to carry the flats of posies, but for those that needed a four-wheeled helper; not to worry, there were rental carts available for a modest price of $5 an hour from a street vendor.

Shoppers of all ages were in attendance. Everyone couldn’t help but have a great time with the magnificent weather, abundance of food and incredible deals on vegetables, trees, shrubs and of course the hot ticket of the day – flowers!

Young girl helps mom with the 'Flower Wagon' on 'Flower Day' at Eastern Market, Detroit, MI...

Helping mom with the 'Flower Wagon' at Eastern Market...

What goes great with flowers? Music and food, of course, and there were plenty of both on this ‘Flower Day’! The air was thick with the sweet aroma from open-air grilling. Several food vendors served the masses ribs, chicken and shrimp all grilled to perfection along with the traditional fare of burgers and hot dogs.

Music was featured at the gazebo as well as in the main thoroughfare with artists like Alfonso Lawrence playing acoustic guitar and singing top-40 and R&B hits. I checked in with a couple of DJs at 1345 Division Street.

Street dancers at 1345 Division Street.

Street dancers at 1345 Division Street.

The street was blocked off and rockin’ to techno and dance music. Dancers were in the street ‘bustin’ a move’ to the beat while shoppers were buying used vinyl LPs and custom-made ‘T’ shirts at the store. I saw lots of smiles…

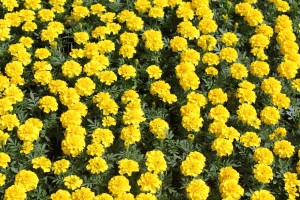
Flats of Marigolds

Flats of Marigolds


From Riopelle Street all the way to Chrysler Drive there were shoppers galore!

To Be Continued…

The crowds loved the selection at the Belleville Nursery booth

Tags: , ,

  • Digg
  • Del.icio.us
  • StumbleUpon
  • Reddit
  • Twitter
  • RSS

Herbs: A Great Alternative to Seasoning With Salt! – By Paula Kraus

I had a blast helping Barson’s Greenhouse – http://www.barsons.com/ – celebrated their 30th year in business over the weekend. I taught the cooking and preserving herbs’ class. Barsons also offered a number of other gardening classes to educated there customers on topics such as canning and butterfly gardening.

Herbs, what a great alternative to seasoning with salt!

A few of the most noteworthy tips:

* Pinch back your plants to increase branching, so you’ll get more leaves to harvest. * Pinch off flowers to extend the leaf production (use chive flowers in salad). Pinch at the node, where usually two tiny leaves are starting to sprout. * Harvest and dry herbs all summer long. Don’t wait till the end of the season to figure out what you want to do with them. * Use a rattan paper plate holder as a drying rack. Carry one with you when you head out to the garden. Set it on top of the refrigerator, where warm air circulates. * Never harvest more than 50% of the plant. * Use a three to one ratio of fresh herbs in place of the dried herbs called for in a recipe. Three teaspoons of minced fresh herb in place of one teaspoon of dried herb. * Freeze chopped fresh herb in ice cube trays. Fill the cell with herbs and enough water to cover them. Then freeze. Use one cube in place of three teaspoons of fresh herbs.

Here’s my favorite basil recipe – I hope you like it!

Spencer’s Modified Pesto

1 Cup Basil leaves, fresh 1 Tablespoon Pine nuts 1 clove garlic 1/2 teaspoon salt (optional) 1/4 Cup Parmesan cheese 1 Tablespoon Romano Cheese 1 1/2Tablespoon Margarine or Butter, softened 1/4 Cup Olive oil, virgin

Combine the first 7 ingredients in a blender or food processor until smooth & thick. Then slowly add the olive oil.

Notes: Store pine nuts in the freezer. Toast nuts first at 350 degrees, turn every 5 minutes till light brown color.

I use the pulse button to process the first ingredients, then use the on button to add the oil.

Substitute the pine nuts with chopped walnuts, almonds, or pecans.

Toss the paste on pasta, with a salad – for a meal. Or, pour three or so tablespoons over a softened 8 ounce block of cream cheese and serve with crackers or toasted baguette slices as an appetizer.

Freeze leftovers in an ice cube tray. Drop one or two cubes in spaghetti, chili, soups for an extra zing.

Paula Kraus is a Master Gardner and owner of ‘Paula’s Plant Plugs’ - http://paulasplantplugs.com/index.html and ‘Seven Sisters Herb ‘N Garden’. She specializes in herb gardening, landscape restoration and plant plug horticulture.

Tags: , , , , , , , , , , , ,

  • Digg
  • Del.icio.us
  • StumbleUpon
  • Reddit
  • Twitter
  • RSS

It’s Spring: Tips on Planting Grass Seed – By Vincent J. Zuzow

Spring is in the air! The Crocus are in bloom and the turf grass is coming to life and proudly displaying this years version of the ever-popular bright green! But, what’s this? There are some brown spots throughout your lawn? That won’t do! Time to make some early spring repairs.

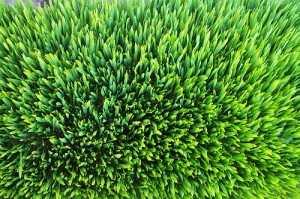
Get a beautiful lawn this year by seeding bare spots in early spring!

One of the two best times for planting new grass is while the season is still young, and the grass is greening up. The other is in the mid to late fall. Two reasons for planting in the spring and fall are; the cool weather, and the abundance of moisture. It just so happens that turf grass thrives on cool weather and lots of rain!

Planting Techniques:

The age-old technique of thrusting your hand into a bag of grass seed and scattering the seed to the wind is still a viable way of getting new grass to grow, but may give a much lower yield of new growth than being a little more systematic about the process. A better way to approach the process is to prepare the soil by roughing the dirt up a bit to allow the seed to penetrate the surface. This can be done by using a hand claw tool or by raking the area with a leaf rake or a steel rake if the soil is dryer or harder in your area.

A thick, full lawn can be yours if you plant early!

If you would like to over-seed a large area – perhaps your whole lawn – you may consider renting a turf slitter or a de-thatcher I have a BlueBird de-thatcher – an industry standard. These can be found in a rental shop and rent for around $35 for 4 hours or $45~$50 for the day. My de-thatcher has a folding handle – a very nice feature. It makes it easy to move in small vehicles and store if you own the machine – it’s very compact that way. I use my machine as slitters to prep soil for planting grass seed. They are very efficient that way. It gives a a nice shallow slit for the seed to germinate.

Once the ground is prepared, spread the seed by hand for small areas, or with a spreader for an entire lawn. Either way, keep the seed close to the ground for less drift, and do not attempt to spread seed on a windy day. Nuff said! If using a spreader, I prefer a small hand-held one over the rolling variety unless the area you’re covering is huge. The reason I use the hand-held spreader is for control. I want the seed to go where I want it to go. You’ll get less drift into your flower beds, for instance. If using a spreader, set the control to about half way open and see how the seed disburses. Adjust the control to be more or less open accordingly.

Starter fertilizer gives your grass seed a boost!

It’s a good idea to use a starter fertilazer to promote initial growth. This will get your seed off and running to a faster germination. Now all you need is some water, and some sunshine! As the new plants begin to grow, protect them from trampling feet and lawn mowers until the grass has a good solid growth of at least two inches or so. It won’t be long until you’re enjoying a thicker, more lush lawn!

Tags: , , , , , , ,

  • Digg
  • Del.icio.us
  • StumbleUpon
  • Reddit
  • Twitter
  • RSS

A New Look For Old Discards: Recycling Throw-aways Into Garden Art! – By Vincent J. Zuzow

Have you ever looked at an old chair or child’s wagon that you were about to discard, and wondered if you could repurpose it as garden art? Well, you’re not alone! Many of us look at what we are about to send off into the great garbage heap down the road, and have second thoughts before letting it go. “Maybe I should hang onto that old bench,” you say “Perhaps that rusted wheelbarrow will last another season,” you rationalize. Sound familiar? Not to worry; you can save the item and save the day as well by using these items in your garden.

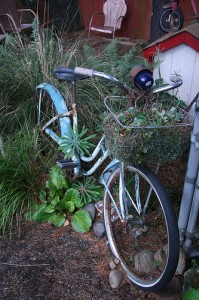
Old bike used as garden art!

Old bike used as garden art!

Everything old is new again…

All it takes is a little imagination and a household or yard item that you don’t mind leaving out in the elements. Yes, what once was a thing of beauty can again become a thing of beauty in a new and unique way! Keep in mind however, this is a one-way trip. Once your 1970s blue metal step-stool leaves your home (if that’s where it came from), and spends time gracing the great outdoors basking in the heat of the sun, and the rust inducing rain and snow, it won’t be fit to grace the kitchen any longer! But, you knew that.

Look around your house, in your garage or attic; chances are that you will find something that can be used in a unique way to house a plant or give an interesting backdrop to a climbing vine!

Popular items to use in your Earthen Gardenas garden art include:

  • baskets
  • pots ‘n pans, or any container
  • bicycles
  • tricycles
  • gates
  • fencing material
  • chairs
  • benches
  • old shoes
  • bird houses
  • fountains
  • architectural pieces
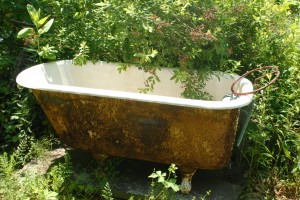
Garden Bathtub

An old bathtub lazes in the shade!

Imagine That!

The only limitation to the types and variety of materials you can use in your garden is your imagination. Got a car bumper or an old rusted push lawnmower? Use it! Got an old pedestal sink or a claw-foot bathtub? Recycle them into your yard instead of throwing them away.

Use whatever you want, wherever you want – after all, it’s your garden! And the beauty of it all is that you just can’t go wrong. If the item you choose doesn’t look right where you have it; move it! If the metal piece rusts after a while; no biggie it ads character! If the basket falls apart over time; simply throw it away! It was going into the garbage anyway…

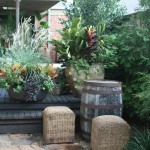
Wooden barrel and baskets add dimension to a back porch!

Creating garden art from your discards is a refreshing outlet for your creativity, and a fun diversion from planting weeding and pruning. To top it off, you’ll get a lot of “wows”, and “ohhhhs” from your visitors to your garden. And, you’ll be the envy of the garden club as they wonder “how did she get so creative?”

Tags: , , , ,

  • Digg
  • Del.icio.us
  • StumbleUpon
  • Reddit
  • Twitter
  • RSS

Creating ‘Mystery’ With a Climbing Garden! – By Vincent J. Zuzow

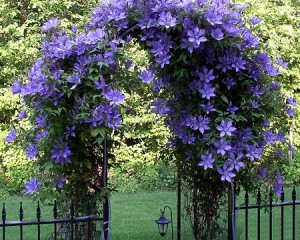
Vibrant Clematis adds mystery to this garden arbor!

Look, up in the sky! It’s a bird, it’s a plane, it’s a… climbing Clematis on a trellis!  What a lovely site! Roses, Clematis, wisteria, annual morning glories, jasmine, grape vines and ivy of all shapes winding their way upwards – stretching toward the heavens to add beauty and privacy to your home!

Do you have a patio that could use a little more shade in the afternoon, or wall of color to obscure the neighbor’s driveway? Would you like to create a little get-away in the back yard for that late afternoon reading time? How about creating movable bursts of color to punctuate your garden? Having a high-rise wall of foliage can create mystery in the yard or garden by allowing the visitor to your garden a sense of adventure and intrigue. By introducing vertical elements into your garden, you build a mild suspense. What is on the other side of that dense green tapestry?

Climbing gardens are nothing new, dating back to at least the 18th Century when traditional European gardeners used Treillage to punctuate their areas with wooden structures where plant life wove itself into the inviting openings of the architecture. These movable structures can be a great addition today as well in your Earthen Garden!

In order for plants to climb, they need a structure to cling to. Perhaps the most popular structure for plants to climb is a simple trellis. This usually consists of thin pieces of wood, metal or plastic brought together in a criss-cross pattern. Depending upon how creative you are, your trellis can take on attributes that make it an elaborate work of art!

You may choose to buy a pre-made trellis like these:


or make you own. Here is a pre-made Garden and Bench/Trellis plan that’s sure to fit your budget, and make you look like a ‘trellis titan’, if you’re a little shaky about designing one yourself.

A simple treillage obelisk structure can be made by building three triangular wooden frames out of pine wood, or whatever 1X2 or 2X2 wood you happen to have; and covering the area with a sub straight for the plant to attach itself to. This sub straight can be wooden or plastic lattice purchased from a store and cut to size, or a screen material (like Duramesh® PVC Coated Hex Wire 1′ x 150′ – Growers Supply), or chicken wire stapled to the wooden frame.

After completing the construction, lean the three frames together to form a point at the top (think tall pyramid), and secure them together with wire, string or wire ties (plastic straps that ratchet as they close in a ‘one-way’ fashion). There you have it, a treillage obelisk! Don’t be too concerned if the initial structure seems a bit unsteady or unsightly, the strength of the piece will increase as the planting grows and intertwines with the structure, and your construction – however crude or elaborate – will soon disappear behind a living wall of beauty!

Items you may need for a do-it-yourself project:

• A quantity of 1X2 or 2X2 or 2X4 wood (depending upon the size of the project)

• Staples, nails or wire

• Stapler, stapler gun

• Lattice, wide mesh screen or chicken wire

• Plant material

Selecting the plant material is a matter of choice based upon your personal color choice, and plant likes and dislikes. As mentioned above some of the varieties include:

• Roses

• Clematis

• Wisteria

• Annual morning glories

• Jasmine

• Grape vines

• Ivy (Boston ivy, Virginia Creeper)

• Trumpet vine

• Black-Eyed Susan vine

• Climbing Snapdragon

Placing your Treillage facing south will give the best sunlight for maximum growth during the growing season, but it may not give you the desired effect you had in mind. Many gardeners find the idea of concealment to be the prime motivator in a climbing garden, and the area they want to conceal may not always be facing south. That’s not a problem. Choose the area you feel will have the greatest impact in your yard or garden, and begin building and planting!

As spring turns into summer, your climbing gardens will turn into unique lush works of art that will add, excitement, form and a sense of mystery to your Earthen Garden!

Tags: , , , , , , ,

  • Digg
  • Del.icio.us
  • StumbleUpon
  • Reddit
  • Twitter
  • RSS

The World Is Your Garden! – By Vincent J. Zuzow

For some people there is nothing more exhilarating than the beauty of nature abounding right outside their door. The lush greens, the vibrant colors, the rich textures! The smell of fresh earth; the tranquillity of a garden! But, what if you live in an apartment or a condominium where there isn’t any room? What if you live in a mobile home, or simply do not have the space for a proper garden in your yard? The answer may be as simple as a few clay pots, and few hours of time after work or on a weekend!

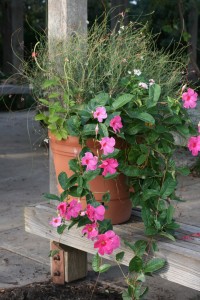
Containers offer 'movable beauty'!

A gardening technique known as Container Gardening is gaining popularity for some of the reasons mentioned above. In addition, it is finding favor with a whole new generation of would-be gardeners that cannot find the time for a larger all-at-one-time garden. A large block of time to devote to your Earthen Garden may be not practical for someone seemingly always one the go, but one or two pots of flowers in an afternoon or evening is doable, and it’s fun!

How do you eat an elephant? One bite at a time! How do you plant a ‘Container Garden’ ? One pot at a time! By breaking the process down to a series of small containers, you will be able to fit your gardening around your work and social schedules. Plant a little tonight; plant a pot or two this weekend – before you know it, you have a beautiful display of your favorite plants, flowers, herbs and veggies!

So, how do you begin? It’s easy, and can cost nothing at all with a little practical ingenuity and – as Ringo sang it – “a little help from your friends”! First gather some containers together. Look around the house, the garage, and ask friends or relatives to check their stock as well. Chances are someone will have some pots they aren’t using and will be happy to donate to the cause. Clay pots are great because they absorb moisture and retain it well. But metal, ceramic, wicker and plastic can also be used with superb results. Make sure the pots have drainage holes in the bottom – otherwise your plants will become ‘drowned’ by the excess build-up of water. If you find your pots don’t have drainage holes, the pot was probably intended for an external decorative use only, try using another pot.

The next step is adding soil. I’ll bet some of the pots you found, or were given by aunt Grace had soil in them already. Chances are reusing that soil will be just fine. It’s best to remove the soil from the original pot (even if you plan to use the same pot with the same soil), and break it up with your hands or a small hand trowel. Breaking the soil makes it easier for the new plants to take root. Remove any old roots and fill your pot about two thirds full of soil. A word to the wise, do not use common clay dirt as your soil. Clay retains too much water, and can also be very difficult for the new plants to survive in.

Your Earthen Garden is almost ready! All that is left is to add your favorite plants, fill the pot to about 1 inch below the rim of the container, and water generously! Container gardens can only draw their moisture from within the container, so make sure to keep an eye on the moisture content of the soil. As long as there is good drainage – making sure you see water flowing out of the bottom of the pot – don’t be afraid to water.

Place your container garden on the front porch, patio, deck, stoop, along the walkway or driveway or anyplace of your choosing. Sit back and enjoy the beauty of your Earthen Garden!
Tags: , , , , , ,

  • Digg
  • Del.icio.us
  • StumbleUpon
  • Reddit
  • Twitter
  • RSS
 Page 3 of 3 « 1  2  3